
By this point, you have successfully navigated the application process and landed the job. Congratulations!
This will be a brief introduction to the job, essentially a tutorial designed to make the learning process easier and quicker for you, and to save time for your supervisor.
For this job, you will need to set up your QLess, Zoom, NVCC email (not vccs), and Teams accounts.
To set up your QLess account, you primarily need your MyNVCC account, which should be provided by your supervisor (gruffinlowry@nvcc.edu).
Once you receive your MyNVCC email (either through your personal email or the email you are using to contact your supervisor), be sure to contact IT support (703-426-4141). They will provide you with the password for your new NVCC email. Please note that this is different from your VCCS email.
Once you have your MyNVCC account and your newly created password, make sure to log into the account using webmail on the Northern Virginia Community College (NOVA) website.
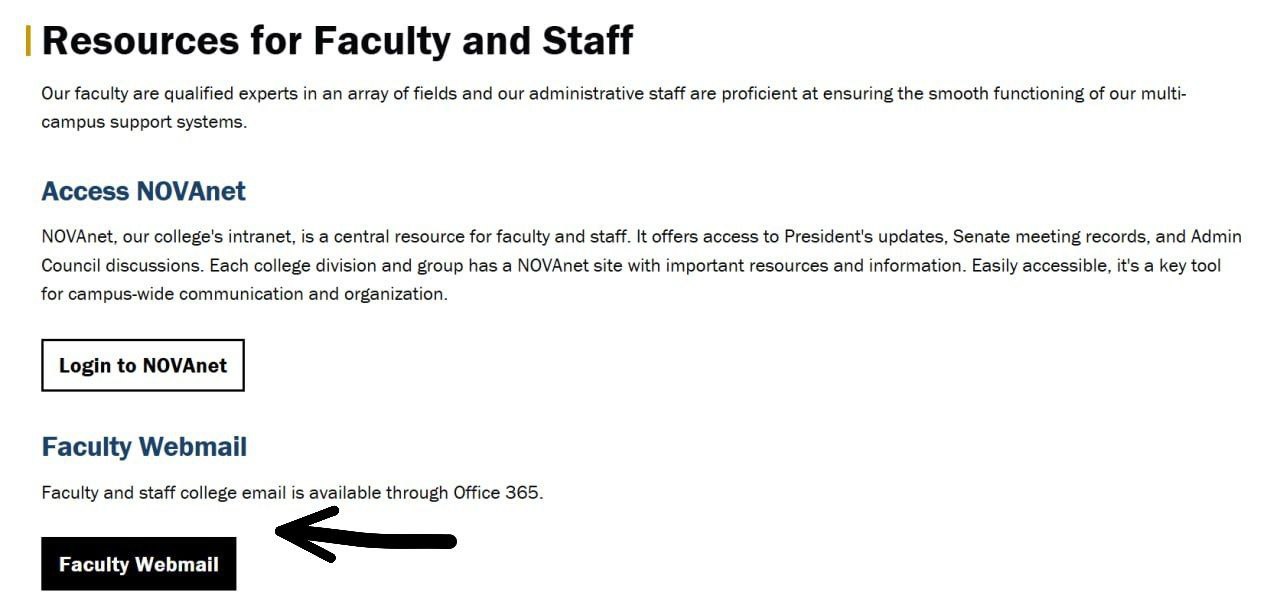
To access your webmail, visit the Northern Virginia Community College Faculty/Staff page .
On the page, tap the Faculty/Staff Webmail option to proceed. The image below shows where to click:
After you have access to your NVCC account, you can use it to log into your Teams account, where you can communicate with your coworkers and supervisors. Through Teams or by directly emailing your supervisor, you can request the QLess link to use your MyNVCC credentials and finally set up your QLess account.
In order to request the QLess link, ask your supervisor at (gruffinlowry@nvcc.edu) or message Germain in your Teams account.
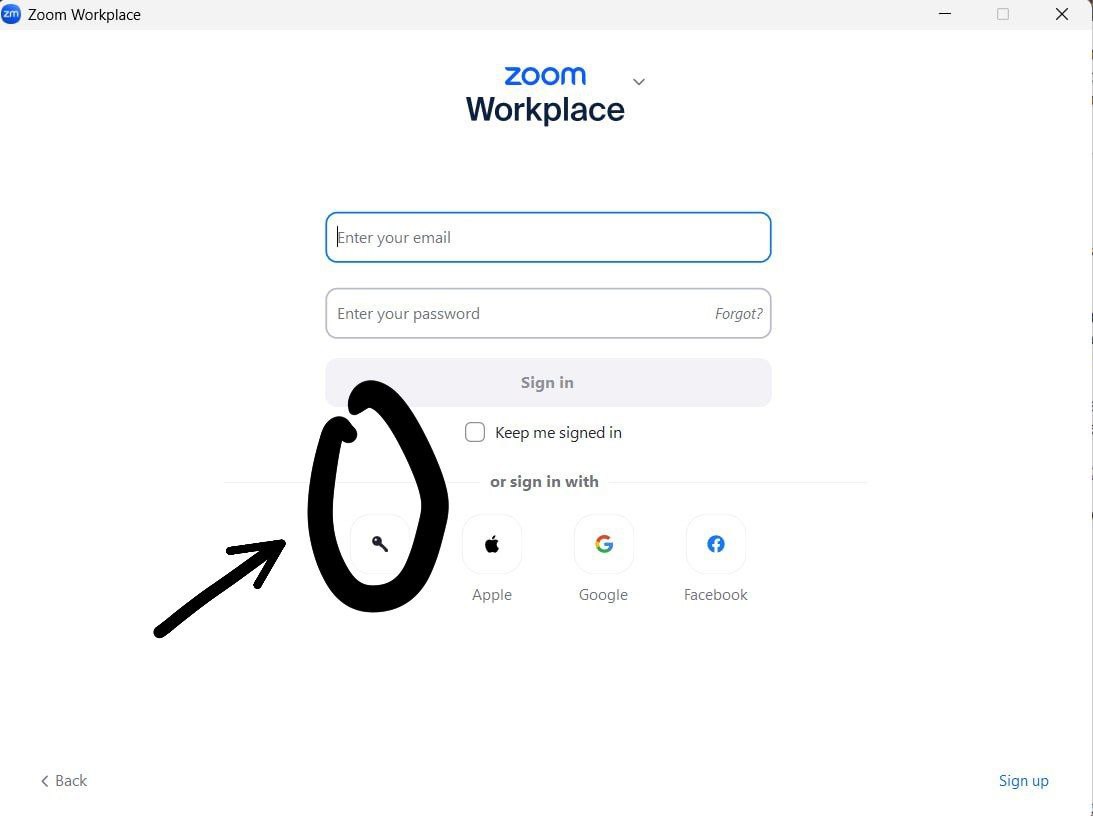
Start by downloading the Zoom application on your computer from the official Zoom website (Download Zoom).
Once installed, open the app and click on the SSO (Single Sign-On) option instead of using your email or password directly. This is the required method for VCCS accounts. The image below shows exactly where to click:
Next, enter vccs as the domain name and hit enter to proceed. You can refer to the following image to confirm you are on the right track:
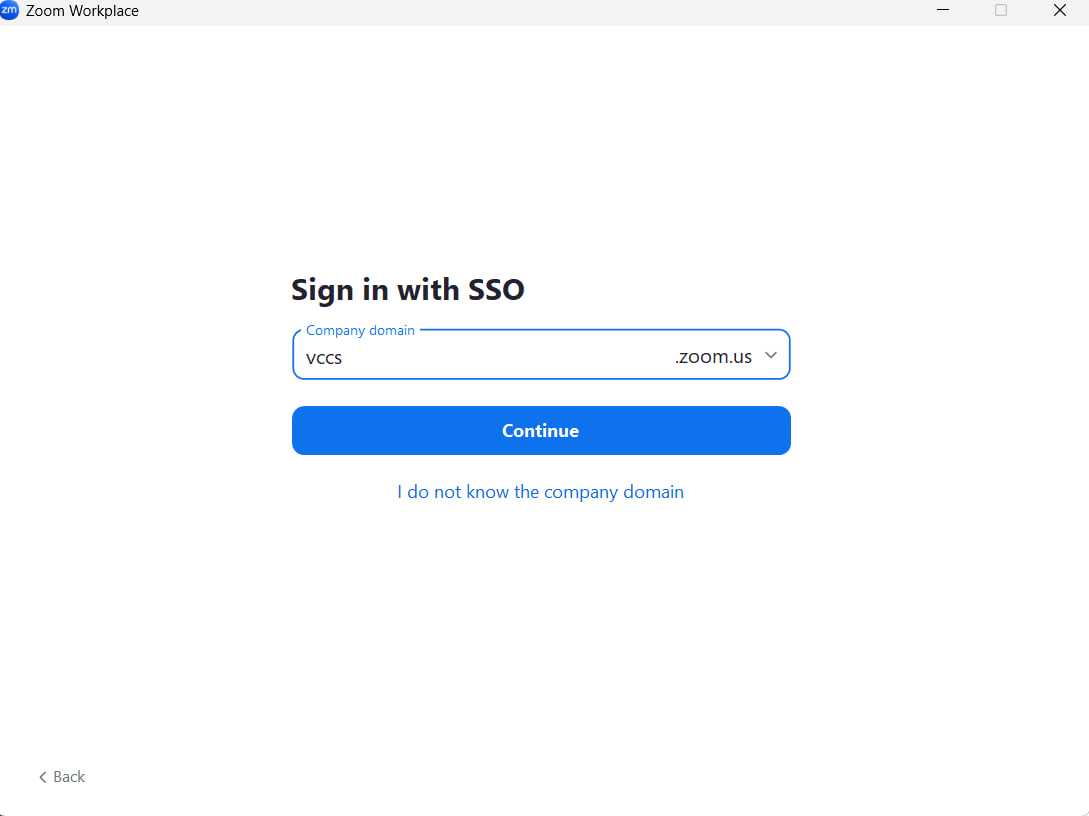
Once logged in, your Zoom setup is complete!
Before finishing this module, make sure you've verified the following:
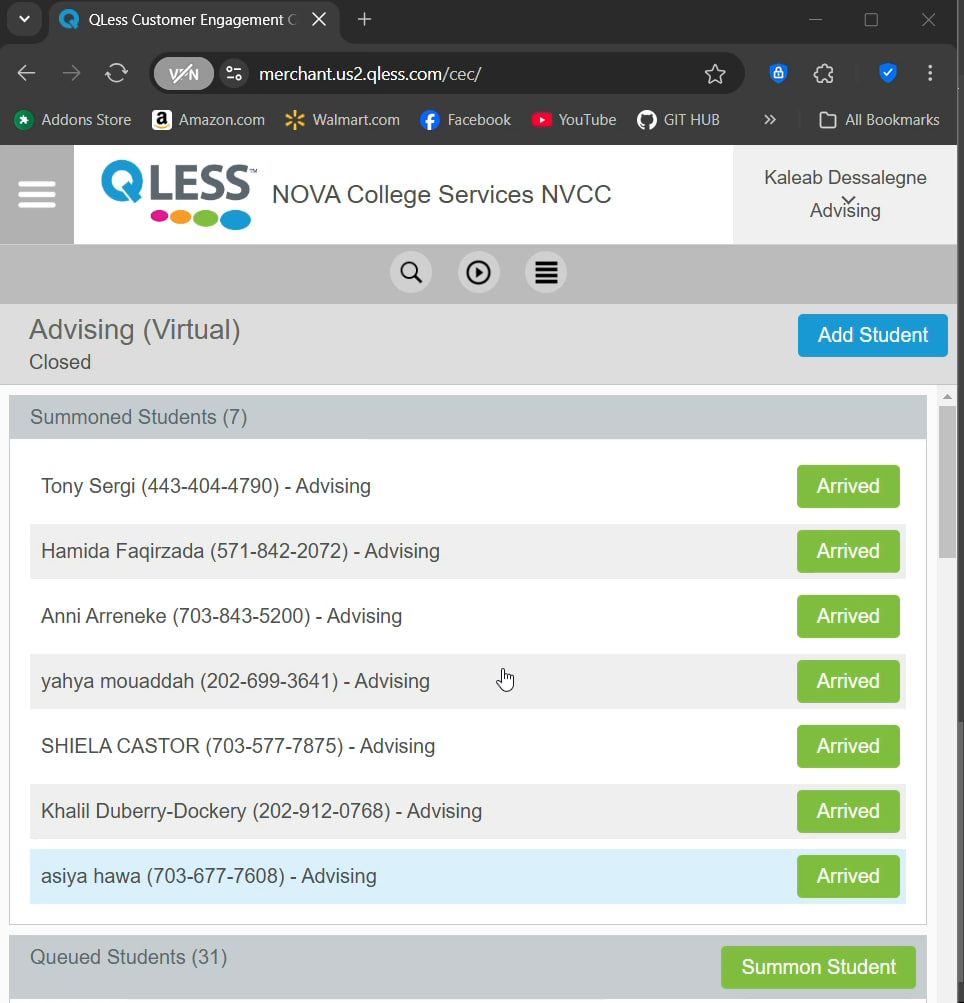
The image below illustrates the expected appearance of your completed QLess interface. Refer to it to confirm your setup. Additionally, verify that "Advising" is displayed below your name in the top right corner; the default setting is often "Accommodations".
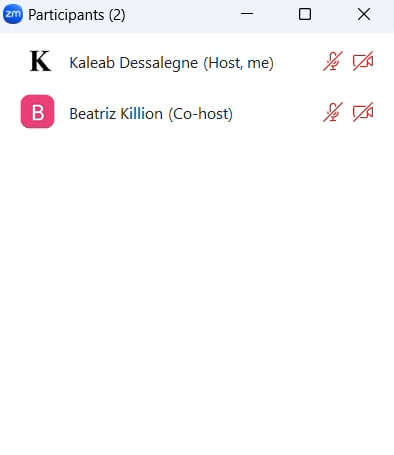
Once you're logged into Zoom, ensure that your name is displayed with either Host or Co-host next to it. This is crucial for having the permissions required for your role. See the image below for an example:
Below is a list of helpful tutorial videos to guide you through additional tasks and responsibilities. Each video will come with a short explanation so you can decide what to watch based on your needs.
Video 1: Step 1 - Initial Setup
This video demonstrates the initial steps required to set up your account and tools.
Takeaways:
Video 2: Covering Different Scenarios and What to Do
This video covers various scenarios and the steps to handle them effectively.
Takeaways: The points below are takeaways from the video and are just summaries of what was covered in Video 2.
Note: Please watch the entire video, even if it mentions that certain parts are optional. The information throughout is crucial for your understanding.
Difference between cohost and host:
Structure of breakout room (waiting room and advising room):
Zoom link and phone number what students see after they get summoned:
What to do when the student's name is not listed in the Qless:
Dealing with a person needing financial aid:
Moving students to waiting room:
Prioritized summoning:
Requesting for a specific advisor:
Video 3: Priority Summoning
This short video covers how to do priority summoning.
Takeaways: Prioritize summoning people in need of financial aid and IT support.
This section outlines the procedure for setting up the appropriate settings when you are the first person to join the Zoom meeting. This typically occurs during the early shift when you log in and prepare the meeting before others arrive.
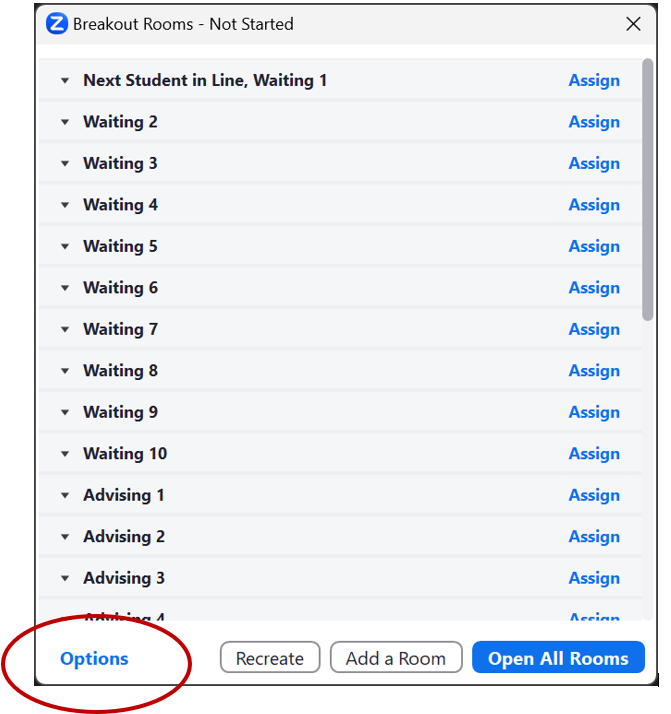
Step 1: Select "Options" at the bottom left of the Breakout Rooms box (it is only available to the first person of the day BEFORE rooms are open).
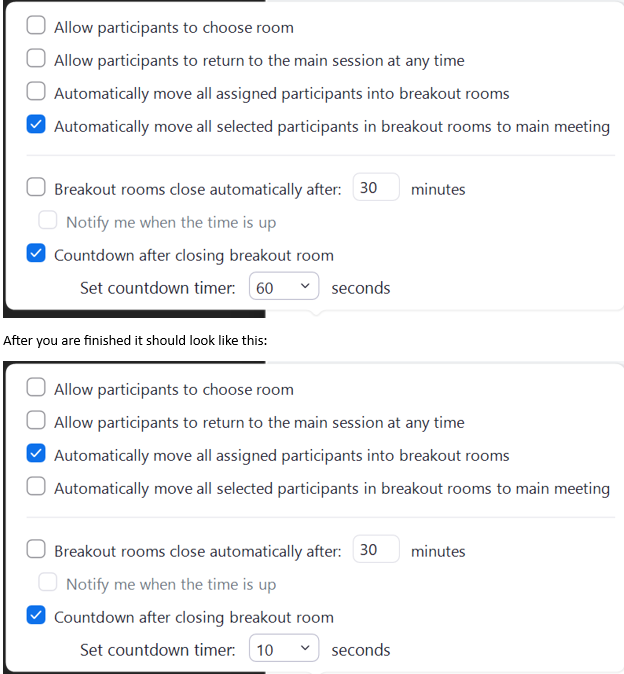
Step 2: Default Settings that need to be changed:
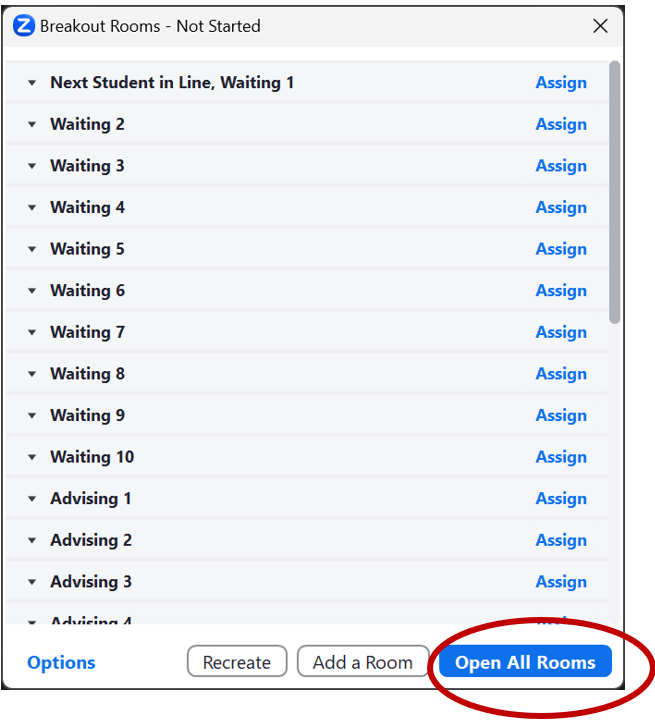
Step 3: The final step is to click "Open All Rooms" on the bottom right of the box.
You've officially completed the entire training tutorial. Great work making it through each module, step by step. You're now equipped with all the essentials to get started smoothly, and confidently handle your responsibilities on the job.
Before you go, a quick word from the creator of this guide:
I kept this website simple — maybe even a little unattractive — not just because I'm slash lazy 😅, but also to leave the door open for you. There's an opportunity here. Take this site, improve it, personalize it, and if you're into design or development, maybe even add it to your resume. That's exactly how it opened big doors for me, and I genuinely hope it can do the same for you.
The job is easy — but you can always make things much easier.
Good luck out there. You've got this.
This guide and website were designed by Kaleab Dessalegne.
Data collection and content curation were provided by Petros Bogale.
If you have questions, feedback, or are interested in improving this guide or collaborating further, feel free to reach out: